

Que ce soit pour une enquête de satisfaction, un retour sur un produit, sur un service, Formbricks est un outil qui mérite le coup d’œil. Sans aucune connaissance, quand je l'ai testé, j'ai pu faire une enquête en quelques minutes. C'est très intuitif!
La prochaine version sera disponible en plusieurs langues mais pour le moment l'interface est en anglais mais par contre vous pouvez entrer dans les champs la langue que vous souhaitez, sans problème.
⚡Caractéristiques
- 🎯 Conçu sur mesure pour les produits SaaS et numériques : créez des enquêtes étonnantes et hautement configurables qui permettent de meilleures décisions sur les produits, une segmentation approfondie des utilisateurs et la personnalisation.
- 🌐 Agnostique en termes de plateforme : Intégrez de manière transparente les enquêtes Formbricks dans les applications web, mobiles ou de bureau.
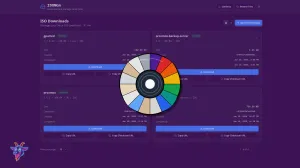
- 📊 Complétez le puzzle analytique : Répondez au " pourquoi " de l'analyse de vos produits grâce à des outils d'analyse et de visualisation des données perspicaces.
- 🧪 Déclenchement intelligent : Montrez la bonne enquête au bon moment avec des déclencheurs basés sur des événements pour une recherche précise et des priorités bien définies.
- 🎉 Open-source et auto-hébergé : Bénéficiez d'un contrôle total sur vos données et votre infrastructure grâce à notre solution sous licence AGPL, et restez à l'écoute de notre prochaine version cloud !
- Form Builder : Créez et personnalisez vos enquêtes à l'aide d'une interface conviviale, sans code.
- Ciblage et déclencheurs : Définissez des segments d'utilisateurs spécifiques et définissez des déclencheurs basés sur des événements pour afficher vos enquêtes aux bons utilisateurs au bon moment.
- Intégration : Intégrez de manière transparente Formbricks dans votre application web ou mobile en utilisant les SDKs fournis ou le snippet HTML.
- Analyses et perspectives : Analysez les réponses des utilisateurs et obtenez des informations exploitables pour prendre des décisions éclairées sur les produits.
L'installation
- Téléchargez votre docker-compose.yml:
sudo curl -o docker-compose.yml https://raw.githubusercontent.com/formbricks/formbricks/main/docker/docker-compose.yml
- Génération du secret NextAuth:
sudo sed -i "/NEXTAUTH_SECRET:$/s/NEXTAUTH_SECRET:.*/NEXTAUTH_SECRET: $(openssl rand -hex 32)/" docker-compose.yml
- Générer une clé de chiffrement:
sudo sed -i "/ENCRYPTION_KEY:$/s/ENCRYPTION_KEY:.*/ENCRYPTION_KEY: $(openssl rand -hex 32)/" docker-compose.yml
- Modifier le docker-compose.yml
Veillez à changer ces deux lignes au minimum:
- WEBAPP_URL: http://192.168.1.118:3000 => soit vous mettez l'IP: port ou votre nom de domaine.
- NEXTAUTH_URL: http://192.168.1.118:3000 => soit vous mettez l'IP: port ou votre nom de domaine.
- NEXTAUTH_SECRET: => il sera déjà rempli automatiquement grâce aux deux commandes faites plus haut.
- ENCRYPTION_KEY: il sera déjà rempli automatiquement grâce aux deux commandes faites plus haut.
version: "3.3"
x-environment: &environment
  environment:
    ######################################################## REQUIRED ########################################################

    # The url of your Formbricks instance used in the admin panel
    WEBAPP_URL:http://192.168.1.118:3000

    # PostgreSQL DB for Formbricks to connect to
    DATABASE_URL: "postgresql://postgres:postgres@postgres:5432/formbricks?schema=public"

    # NextJS Auth
    # @see: https://next-auth.js.org/configuration/options#nextauth_secret
    # You can use: `openssl rand -hex 32` to generate one
    NEXTAUTH_SECRET:

    # Set this to your public-facing URL, e.g., https://example.com
    # You do not need the NEXTAUTH_URL environment variable in Vercel.
    NEXTAUTH_URL: http://192.168.1.118:3000

    # Encryption Key is used for 2FA & Single use URLs for Link Surveys
    # You can use: $(openssl rand -hex 32) to generate one
    ENCRYPTION_KEY:

    ############################################# OPTIONAL (ENTERPRISE EDITION) #############################################

    # Enterprise License Key (More info at: https://formbricks.com/docs/self-hosting/license)
    # Required to access Enterprise-only features
    # ENTERPRISE_LICENSE_KEY:

    ############################################# OPTIONAL (EMAIL CONFIGURATION) #############################################

    # Email Configuration
    # MAIL_FROM:
    # SMTP_HOST:
    # SMTP_PORT:
    # SMTP_USER:
    # SMTP_PASSWORD:

    # (Additional option for TLS (port 465) only)
    # SMTP_SECURE_ENABLED: 1

    ############################################## OPTIONAL (APP CONFIGURATION) ##############################################

    # Set the below value if you have and want to use a custom URL for the links created by the Link Shortener
    # SHORT_URL_BASE:

    # Set the below to 0 to enable Email Verification for new signups (will required Email Configuration)
    EMAIL_VERIFICATION_DISABLED: 1

    # Set the below to 0 to enable Password Reset (will required Email Configuration)
    PASSWORD_RESET_DISABLED: 1

    # Set the below to 1 to disable signups
    # SIGNUP_DISABLED:

    # Set the below to 1 to disable logins with email
    # EMAIL_AUTH_DISABLED:

    # Set the below to 1 to disable invites
    # INVITE_DISABLED:

    # Set the below to use it intead of API Key for the API & use as an auth for cronjobs
    # CRON_SECRET:

    # Set the below if you want to ship JS & CSS files from a complete URL instead of the current domain
    # ASSET_PREFIX_URL:

    # Set the below to 1 to skip onboarding process for new users
    # ONBOARDING_DISABLED: 1

    # Set the below to your Unsplash API Key for their Survey Backgrounds
    # UNSPLASH_ACCESS_KEY:

    ################################################### OPTIONAL (STORAGE) ###################################################

    # Set the below to set a custom Upload Directory
    # UPLOADS_DIR:

    # Set S3 Storage configuration (required for the file upload in serverless environments like Vercel)
    # S3_ACCESS_KEY:
    # S3_SECRET_KEY:
    # S3_REGION:
    # S3_BUCKET_NAME:

    # Set a third party S3 compatible storage service endpoint like StorJ leave empty if you use Amazon S3
    # S3_ENDPOINT_URL=

    ############################################# OPTIONAL (OAUTH CONFIGURATION) #############################################

    # Set the below from GitHub if you want to enable GitHub OAuth
    # GITHUB_ID:
    # GITHUB_SECRET:

    # Set the below from Google if you want to enable Google OAuth
    # GOOGLE_CLIENT_ID:
    # GOOGLE_CLIENT_SECRET:

    # Set the below from Azure Active Directory Login if you want to enable Azure AD OAuth
    # AZUREAD_CLIENT_ID:
    # AZUREAD_CLIENT_SECRET:
    # AZUREAD_TENANT_ID:

    # Set the below to OpenID Connect Provider if you want to enable OIDC
    # OIDC_CLIENT_ID:
    # OIDC_CLIENT_SECRET:
    # OIDC_ISSUER:
    # OIDC_DISPLAY_NAME:
    # OIDC_SIGNING_ALGORITHM:

    ########################################## OPTIONAL (THIRD PARTY INTEGRATIONS) ###########################################

    # Oauth credentials for Notion Integration
    # NOTION_OAUTH_CLIENT_ID:
    # NOTION_OAUTH_CLIENT_SECRET:

    # Oauth credentials for Google Sheet Integration
    # GOOGLE_SHEETS_CLIENT_ID:
    # GOOGLE_SHEETS_CLIENT_SECRET:
    # GOOGLE_SHEETS_REDIRECT_URL:

    # Oauth credentials for Airtable Integration
    # AIRTABLE_CLIENT_ID:

    # Oauth credentials for Slack Integration
    # SLACK_CLIENT_ID:
    # SLACK_CLIENT_SECRET:

    ############################################### OPTIONAL (LEGAL INFORMATION) ################################################

    # Set the below to have your own Privacy Page URL on auth & link survey page
    # PRIVACY_URL:

    # Set the below to have your own Terms Page URL on auth & link survey page
    # TERMS_URL:

    # Set the below to have your own Imprint Page URL on auth & link survey page
    # IMPRINT_URL:

    ########################################## OPTIONAL (SERVER CONFIGURATION) ###########################################

    # Set the below to 1 to disable Rate Limiting across Formbricks
    # RATE_LIMITING_DISABLED: 1

    # Set the below to send OpenTelemetry data for tracing
    # OPENTELEMETRY_LISTENER_URL: http://localhost:4318/v1/traces

    # Set the below to use Redis for Next Caching (default is In-Memory from Next Cache)
    # REDIS_URL:

    # Set the below to use for Rate Limiting (default us In-Memory LRU Cache)
    # REDIS_HTTP_URL:

    ############################################# OPTIONAL (OTHER) #############################################

    # Set the below to automatically assign new users to a specific team and role within that team
    # Insert an existing team id or generate a valid CUID for a new one at https://www.getuniqueid.com/cuid (e.g. cjld2cjxh0000qzrmn831i7rn)
    # (Role Management is an Enterprise feature)
    # DEFAULT_TEAM_ID:
    # DEFAULT_TEAM_ROLE: admin

services:
  postgres:
    restart: always
    image: postgres:15-alpine
    volumes:
      - postgres:/var/lib/postgresql/data
    <<: *environment

  formbricks:
    restart: always
    image: ghcr.io/formbricks/formbricks:latest
    depends_on:
      - postgres
    ports:
      - 3000:3000
    volumes:
      - uploads:/home/nextjs/apps/web/uploads/
    <<: *environment

volumes:
  postgres:
    driver: local
  uploads:
- On installe l'application:
docker-compose up -d
ou avec docker-compose V2:
docker compose up -d- Rendez-vous sur l'ip:port, suivant l'IP de votre serveur local et du port choisi, 3000 par défaut:
http://ip:3000/Créer son compte administrateur
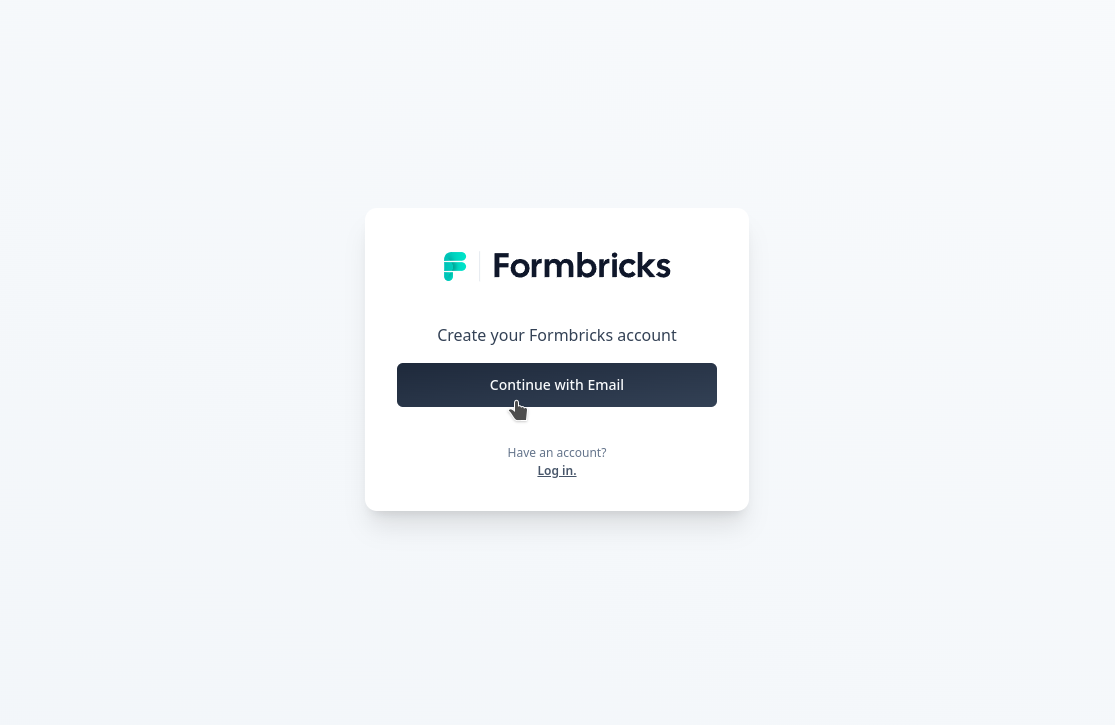
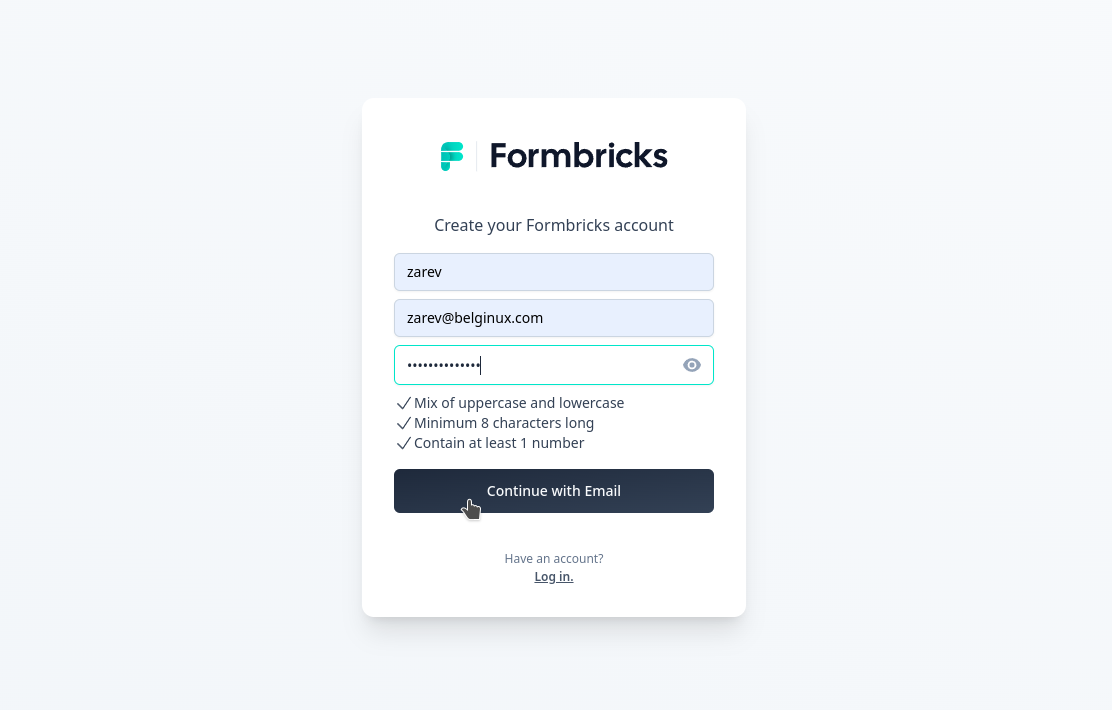
Au premier lancement de la page web, il faudra cliquer sur Create an account pour créer son compte administrateur:
On clique sur Continue with Email:
Remplissez les champs demandés et validez en cliquant sur Continue with Email:
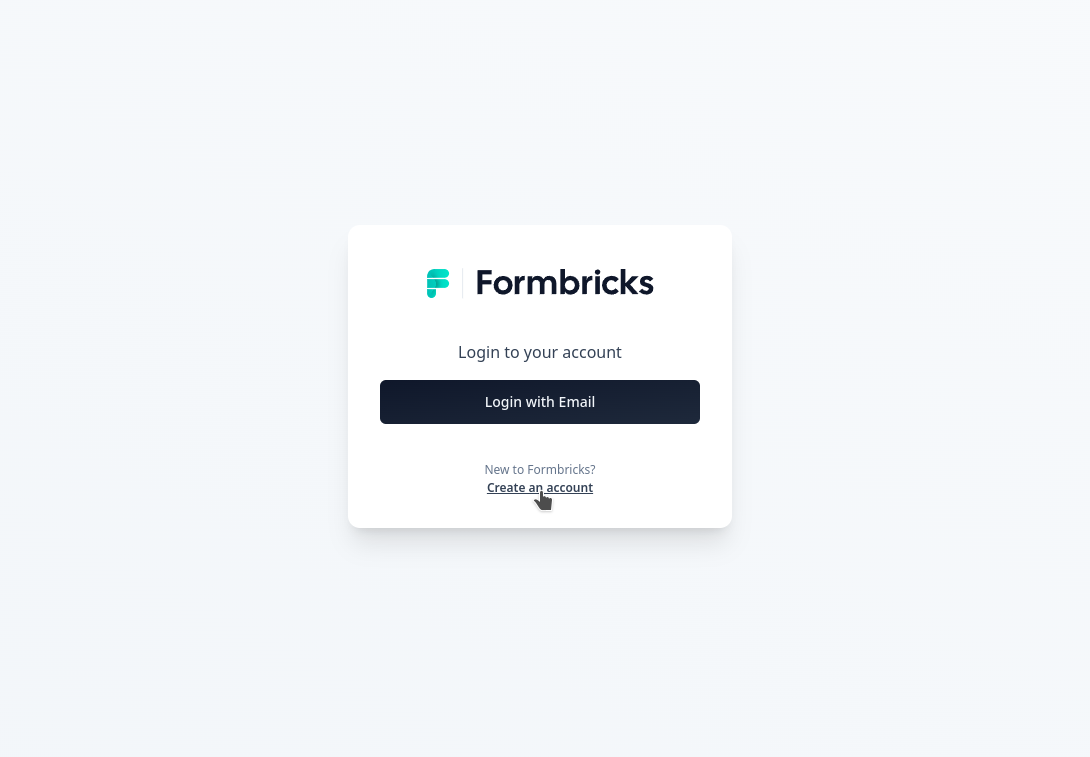
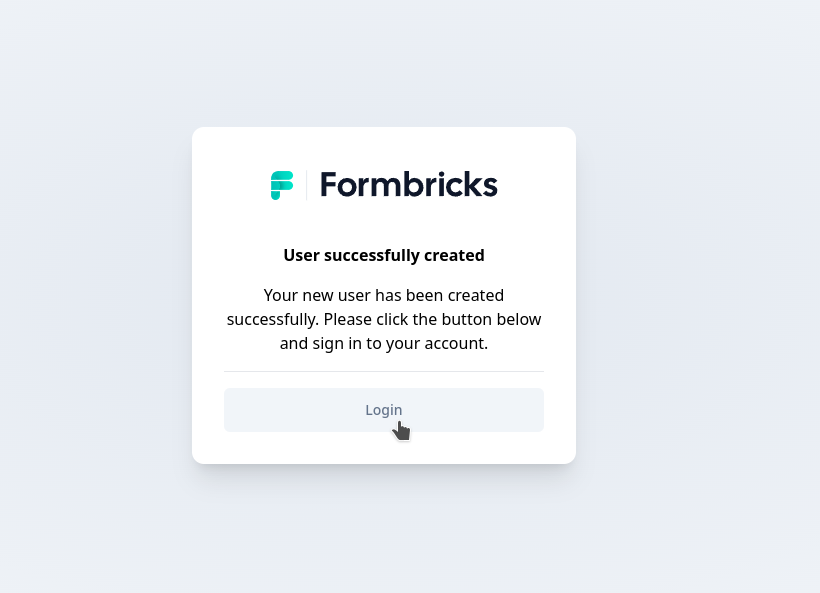
Votre compte est créé, cliquez sur Login pour vous identifier:
On va choisir Login with Email, de toute façon on a pas le choix:
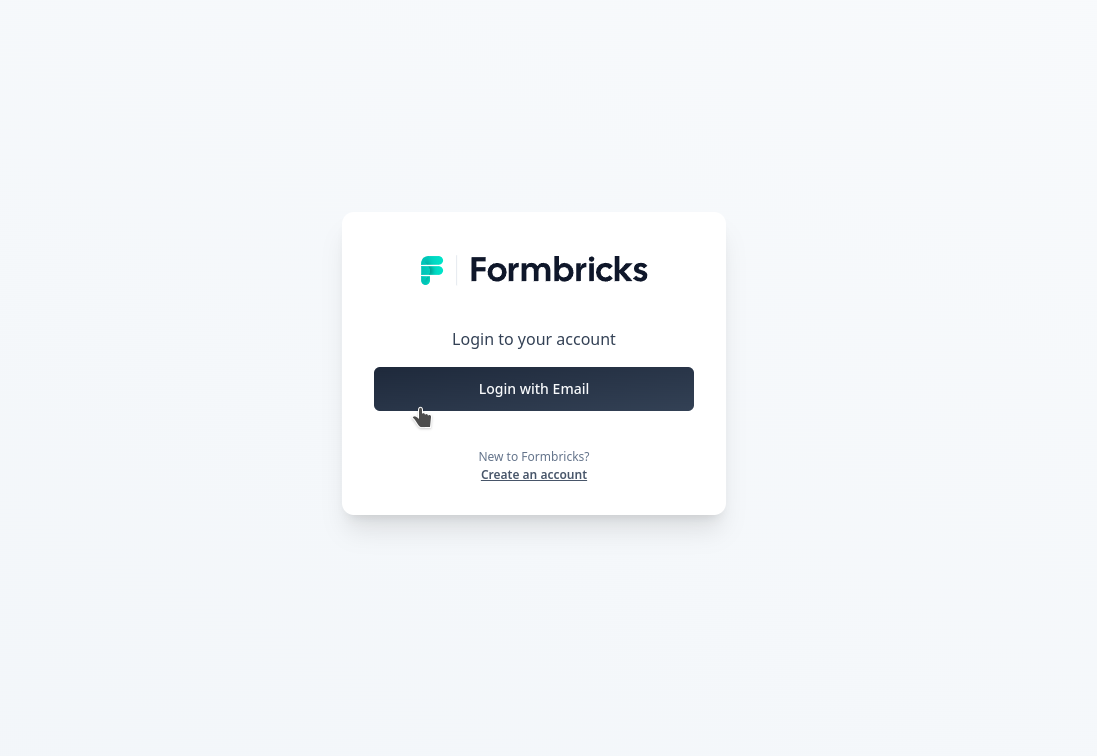
Entre vos informations de compte et cliquez sur Login with Email:

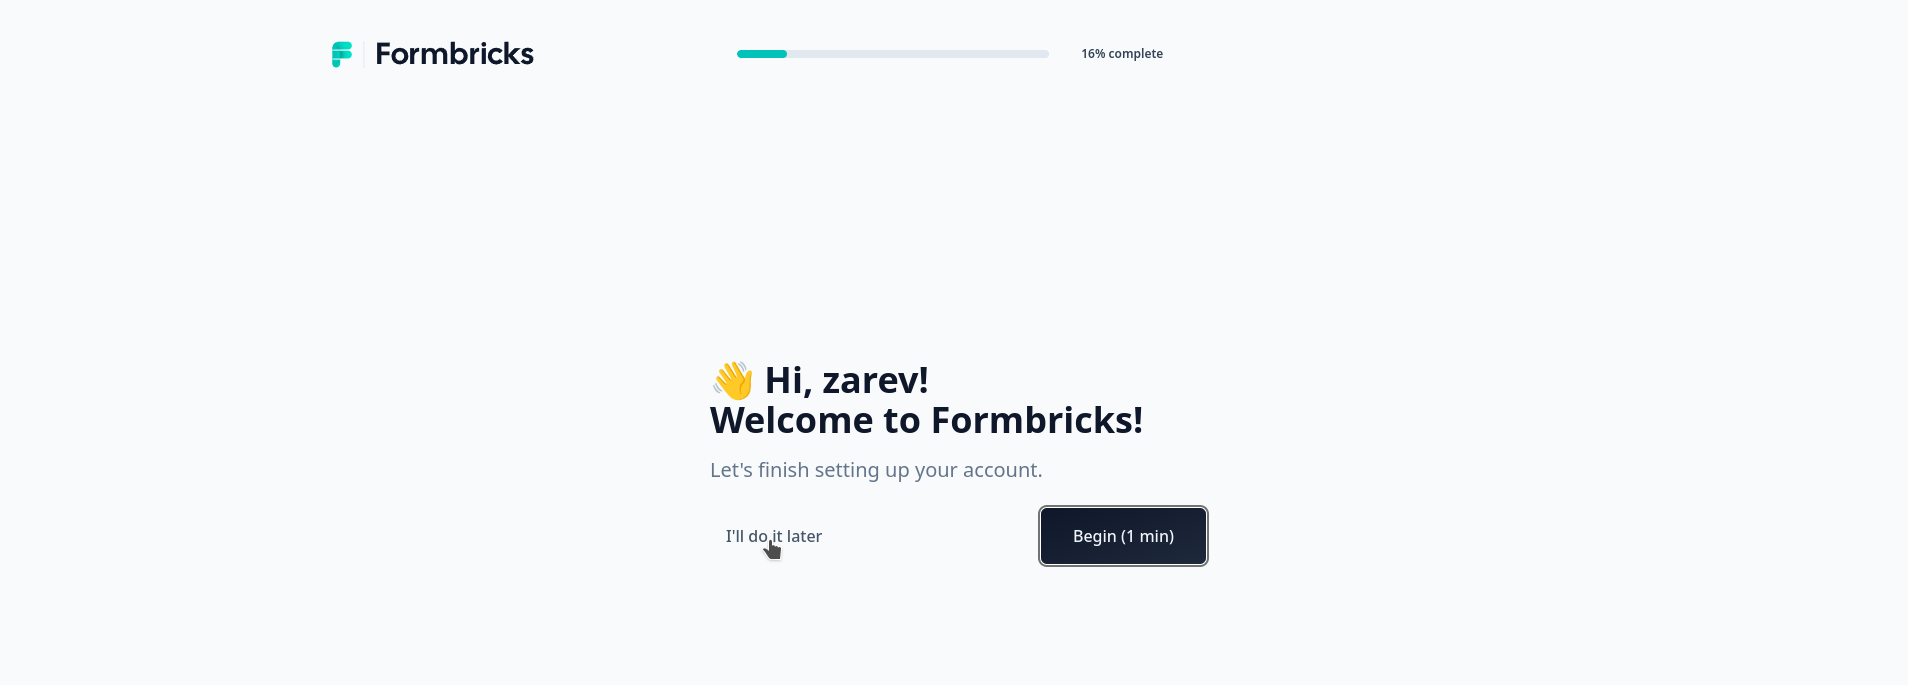
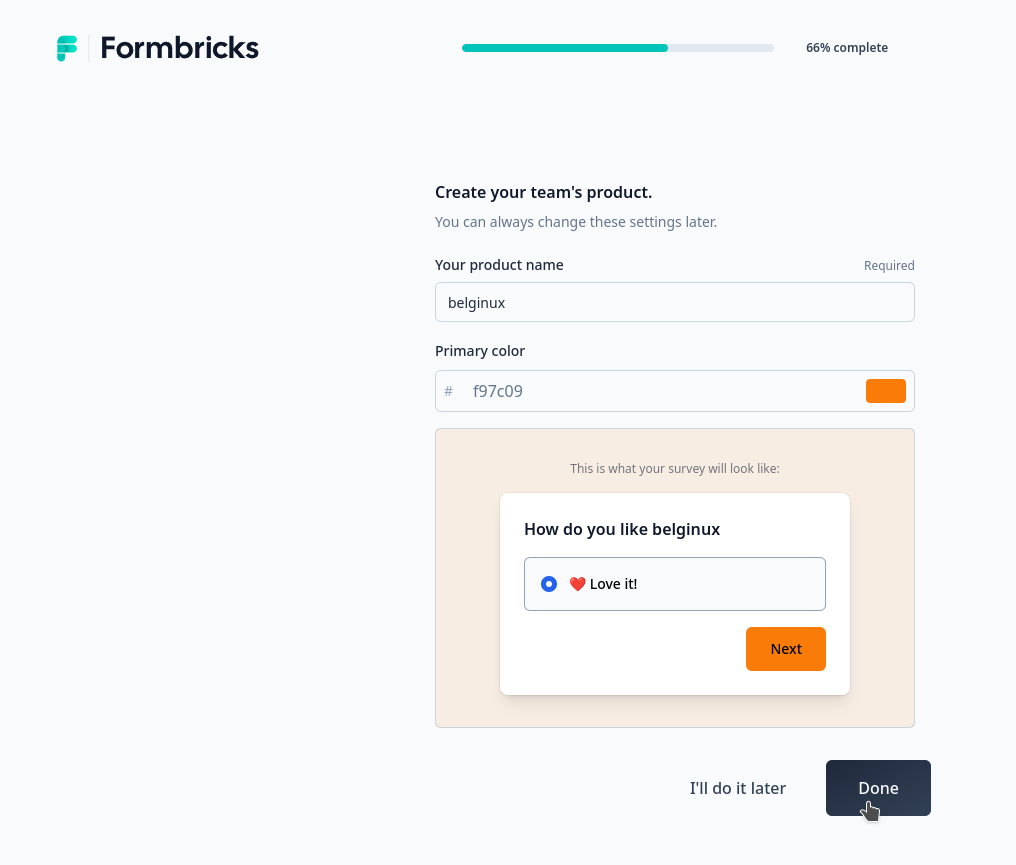
Vous voilà connecté, il va falloir suivre le menu, cliquez sur I'll do it later:
Arrangez à votre convenance. On valide avec Done:
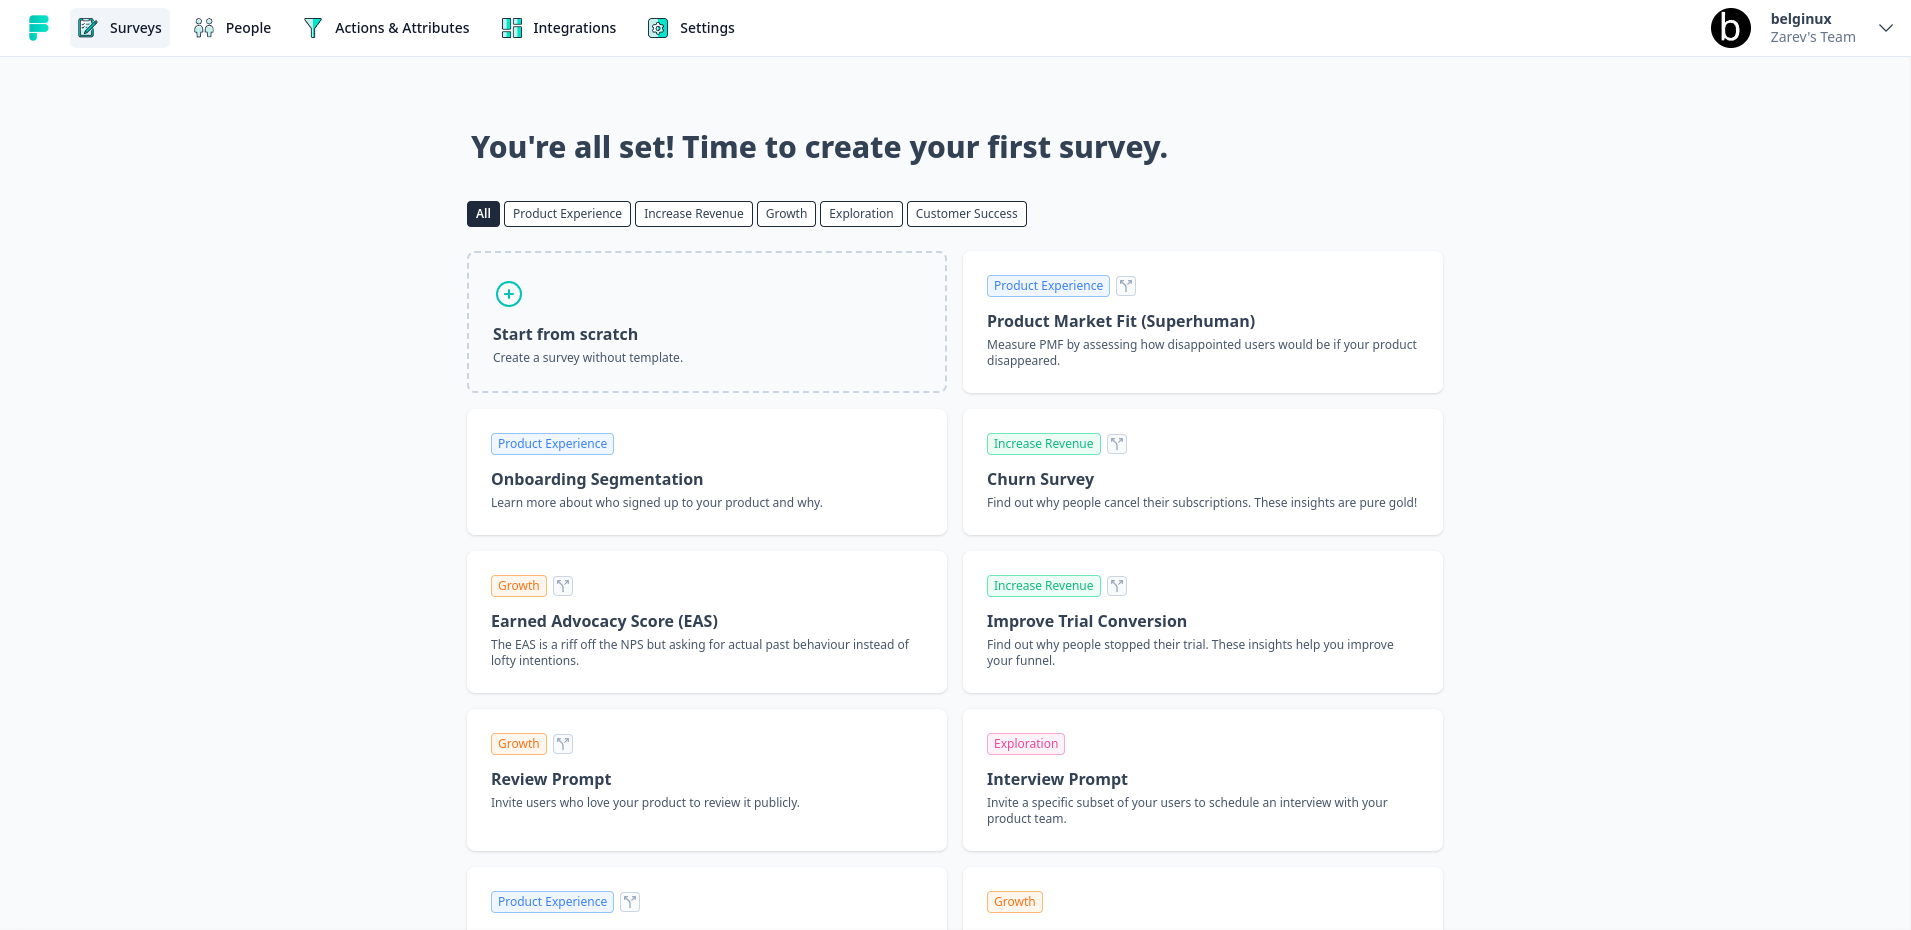
Vous voilà prêt:
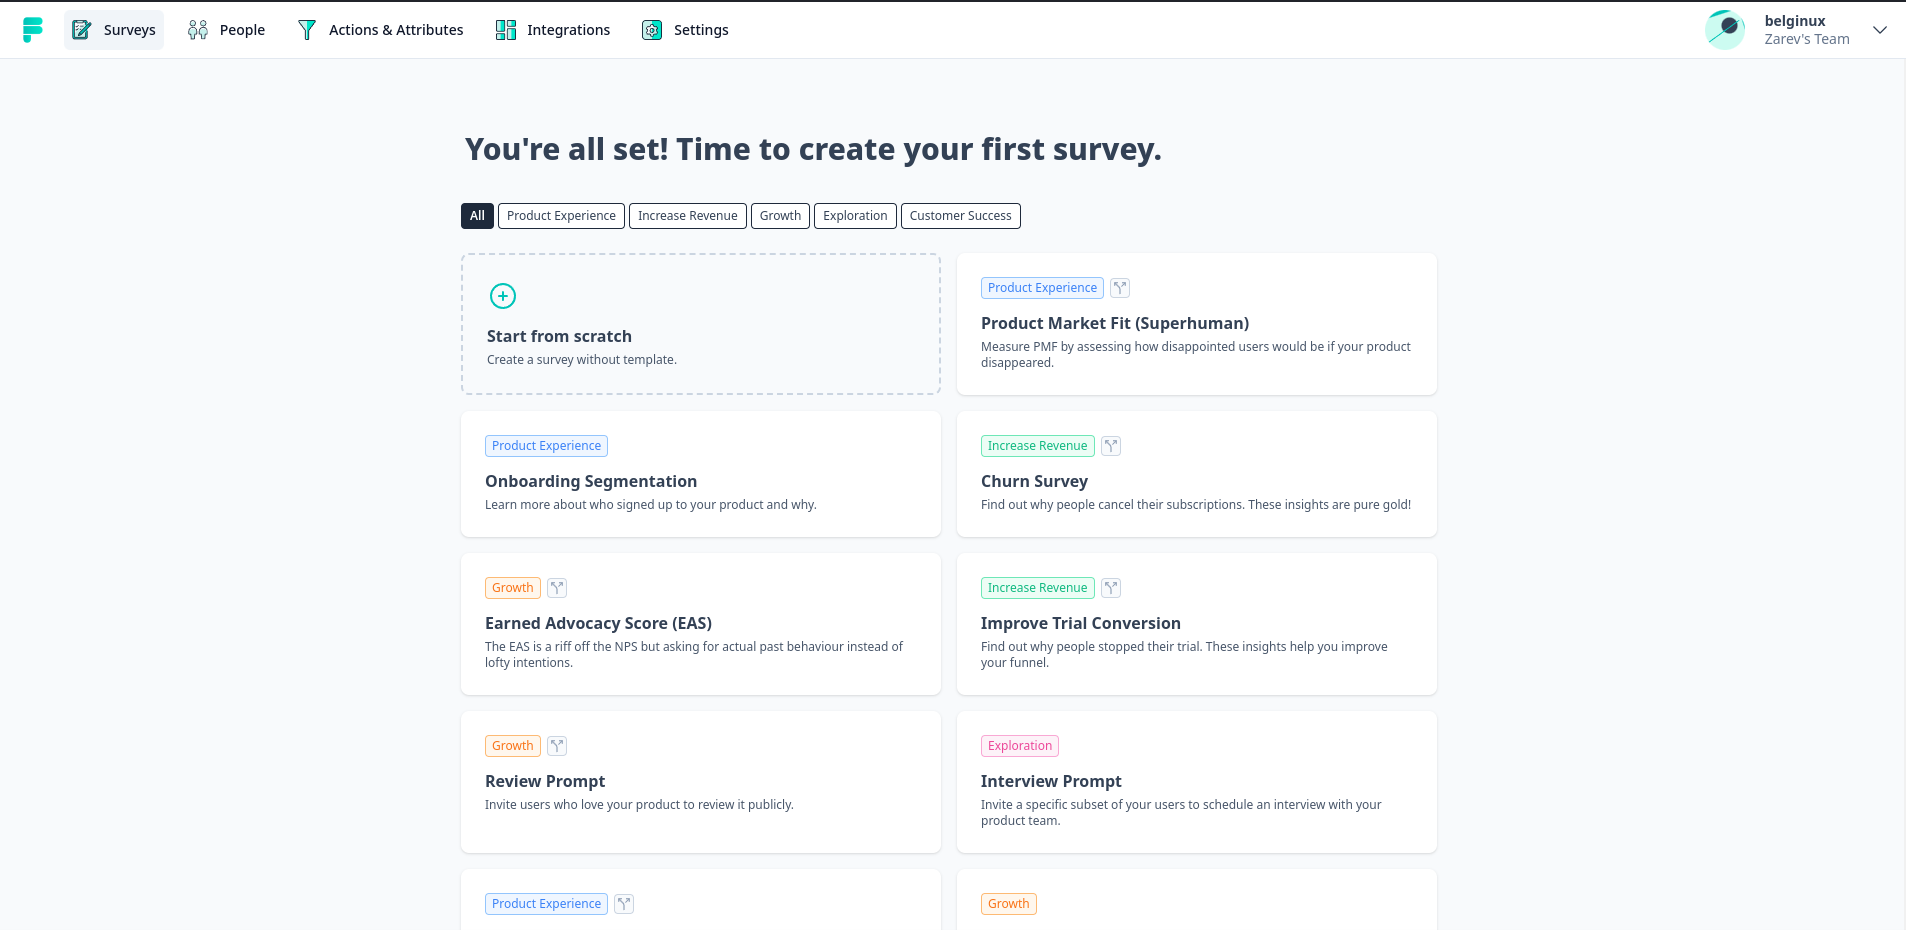
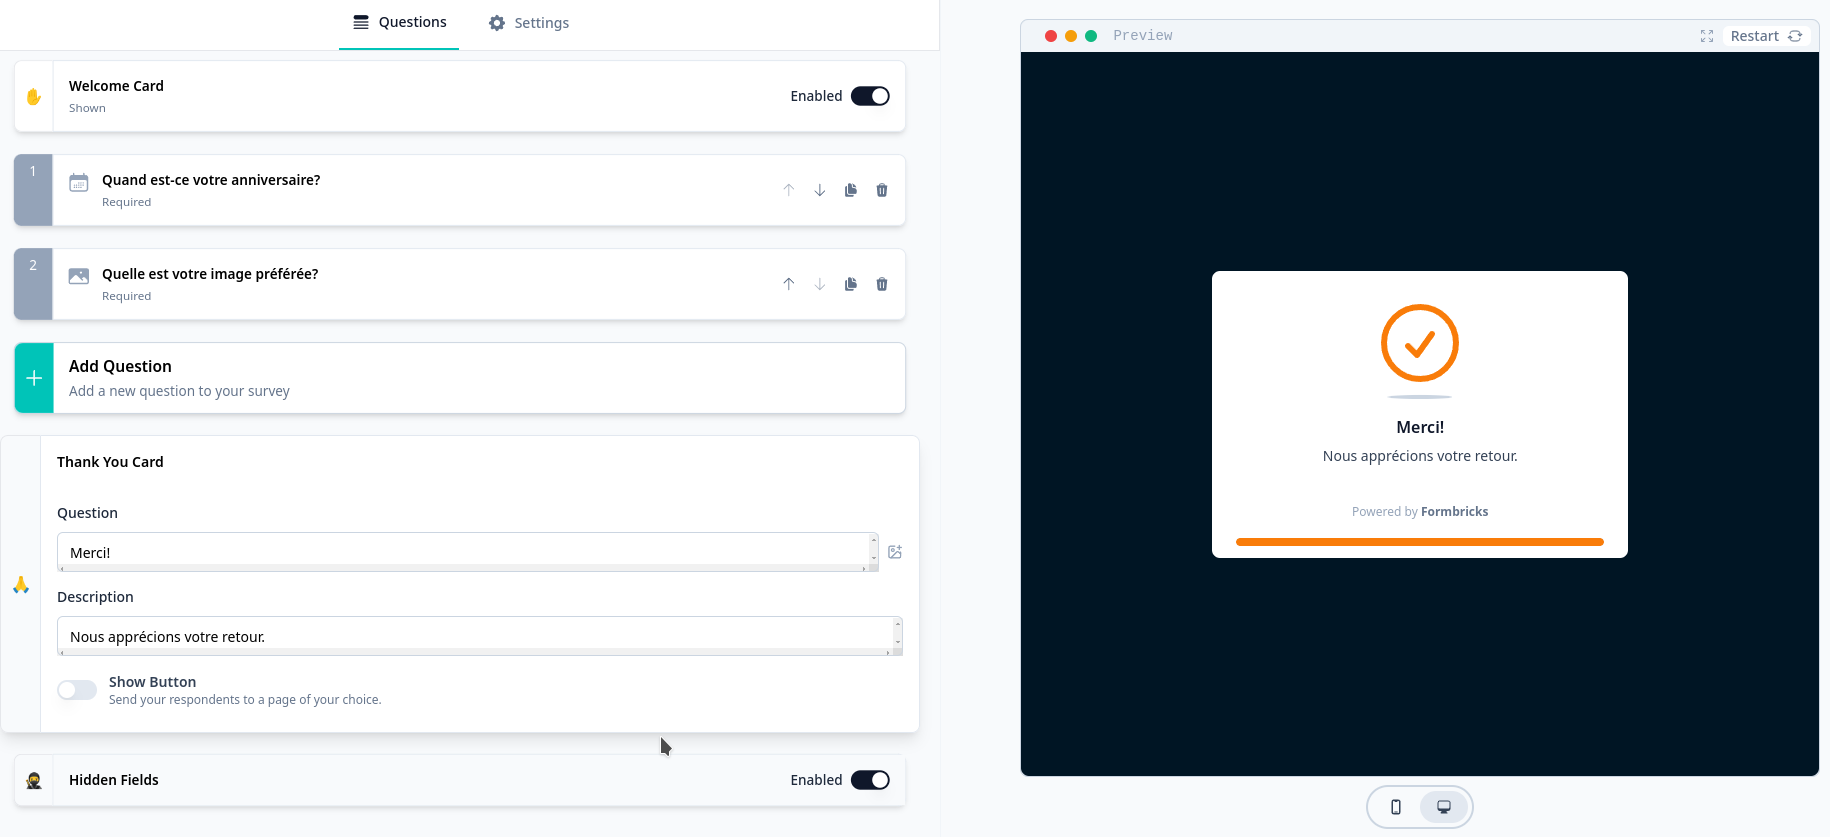
En cliquant sur Start from scratch, vous aurez le loisir de créer très facilement une enquête.
Configurer le serveur mail
Dans votre docker-compose il faudra décommenter toutes ces lignes, sauf la première:
# Email Configuration
# MAIL_FROM:
# SMTP_HOST:
# SMTP_PORT:
# SMTP_SECURE_ENABLED:
# SMTP_USER:
# SMTP_PASSWORD:
Et compléter les lignes demandées. N'oubliez pas qu'avec Gmail il y a une petite procédure à faire.
Certains paramètres ci-dessous peuvent changer suivant la configuration que vous voulez:
#Email Configuration
MAIL_FROM: zarev@belginux.com
SMTP_HOST: smtp.xxxx.com
SMTP_PORT: 465
SMTP_SECURE_ENABLED: 1
SMTP_USER: zarev@belginux.com
SMTP_PASSWORD: MotDePase
N'hésitez pas à demander de l'aide en cas de besoin.


